

As I started the developpement of Fitbit applications and clock faces I decided to try to contribute to the Fitbit SDK development.
A question was asked in the Discord chat room from developer:
So I decided to suggest one idea inspired from Fitbit itself.
Indeed Fitbit, to introduce their devices, use panorama feature. Their mobile application does and so do many applications. When I try to do it i realized that the starter interface:
- does not take so much place as code in injex.js and some functions can be usable for other needs for example the back button management.
- is very easy to install in a interface.
- should have been put in place in my first application
 «
«
So now let’s Go!
1) Requirements
2) Interface
You have to understand that you have to manage the fitbit app interface in one side , the starter interface in the other side. For my example, I have a blank interface with the sentence: « your app here ».
As we are going to use parnorama and button/text widgets we have to declare them in widget.gui
<link rel="import" href="/mnt/sysassets/widgets/baseview_widget.gui" />

<link rel="import" href="/mnt/sysassets/widgets/panoramaview_widget.gui" />

<link rel="import" href="/mnt/sysassets/widgets/pagination_dots.gui" />

<link rel="import" href="/mnt/sysassets/widgets/combo_button_widget.gui" />

<link rel="stylesheet" href="/mnt/sysassets/widgets/dynamic_textarea.css" />

<link rel="import" href="/mnt/sysassets/widgets/dynamic_textarea.gui" />

<link rel="import" href="/mnt/sysassets/widgets/square_button_widget.gui" />

<link rel="import" href="/mnt/sysassets/widgets/mixed_text_widget.gui" />

screen of the app
The code for this is very easy : I just put a text in index.gui
<!-- your app functionality-->
<text y="50%" x="50%" fill="white" text-anchor="middle">your app here</text>
Now let’s focus to the starter. The feature I use is panorama
I love that feature that allow to switch from a page to another one.
For that tutorial I decided to intialize 4 pages to « explain » my app.But you can add more or remove. it will demand how long you want to explain how to use
Here are my pages:

page 1
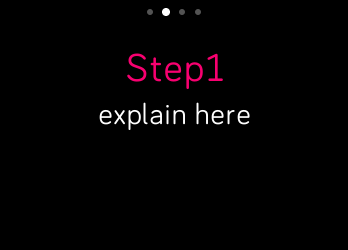
page 2

page 3
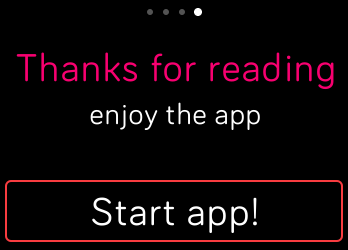
page 4
Now the code of that part ( in index.gui ) is:
<!-- the starter example -->

<use id="startcontainer" href="#panoramaview" >

<use id="item1" href="#panoramaview-item">

<rect fill="black" width="100%" height="100%"/>

<use href="#mixed-text-center-mid" class="dialog-mixed-text" fill="fb-white">

<set href="#top-padding" attributeName="display" to="none" />

<set href="#header/text" attributeName="text-buffer" to="welcome" />

<set href="#header/text" attributeName="fill" to="fb-magenta"/>

<set href="#copy/text" attributeName="text-buffer" to="how to use my app" />

<set href="#bottom-padding" attributeName="display" to="none" />

</use>

</use>

<use id="item2" href="#panoramaview-item">

<rect fill="black" width="100%" height="100%"/>

<use  href="#mixed-text-center-mid" class="dialog-mixed-text" fill="fb-white">

<set href="#top-padding" attributeName="display" to="none" />

<set href="#header/text" attributeName="text-buffer" to="Step1" />

<set href="#header/text" attributeName="fill" to="fb-magenta"/>

<set href="#copy/text" attributeName="text-buffer" to="explain here" />

<set href="#bottom-padding" attributeName="display" to="none" />

</use>

</use>

<use id="item3" href="#panoramaview-item">

<rect fill="black" width="100%" height="100%"/>

<use href="#mixed-text-center-mid" class="dialog-mixed-text" fill="fb-white">

<set href="#top-padding" attributeName="display" to="none" />

<set href="#header/text" attributeName="text-buffer" to="Step2" />

<set href="#header/text" attributeName="fill" to="fb-magenta"/>

<set href="#copy/text" attributeName="text-buffer" to="explain here" />

<set href="#bottom-padding" attributeName="display" to="none" />

</use>

</use>

<use id="item4" href="#panoramaview-item">

<rect fill="black" width="100%" height="100%"/>

<use href="#mixed-text-center-mid" class="dialog-mixed-text" fill="fb-white">

<set href="#top-padding" attributeName="display" to="none" />

<set href="#header/text" attributeName="text-buffer" to="Thanks for reading" />

<set href="#header/text" attributeName="fill" to="fb-magenta"/>

<set href="#copy/text" attributeName="text-buffer" to="enjoy the app" />

<set href="#bottom-padding" attributeName="display" to="none" />

</use>

<use id="mybutton" href="#square-button" y="70%" fill="fb-red">

<set href="#text" attributeName="text-buffer" to="Start app!" />

</use>

</use>

<!-- Have enough pagination dots for your slides (extras are hidden) -->

<use id="pagination-dots" href="#pagination-widget" y="8">

<use href="#pagination-dot" />

<use href="#pagination-dot" />

<use href="#pagination-dot" />

<use href="#pagination-dot" />

<use href="#pagination-highlight-dot" />

</use>

</use>
If you launch the app without any code you will have the page 1 displayed. you will be able to switch from page to page. If you press the Back button you will close the application. But it is not what we exactly want.
3) The code
The application needs to know if the program was open for the first time or not. the solution I chose if the creation of a file. if it is the first time you open the application or if you reinstall it, the application will consider. So only in those cases the starter page must appear. So I use the FS API to create an UTF-8 file. in that file I will add a sentence that will be seen in the console log.For your test feel free to make the starter interface a much as you want.
import document from "document";

import * as fs from "fs";

let startcontainer = document.getElementById("startcontainer");

if (fs.existsSync("/private/data/starter.txt")) {

let textfromfile  = fs.readFileSync("starter.txt", "utf-8");

console.log(

textfromfile);

// comment the line below if you want the turorial to be seen all the time

startcontainer.style.display="none";

}

else

{

console.log("starter display because of first use of the application");

fs.writeFileSync("starter.txt", "starter interface already seen by user", "utf-8");

}
Now you mustn’t forget the button on the page 4. That button while pressed should make the tutorial disappear.
let mybutton = document.getElementById("mybutton");

mybutton.onactivate = function(evt)

{

console.log("button pressed");

startcontainer.style.display="none";

}
Now the back button. you have 2 ways to manage it. it can either close the application or first make the tutorial disappear and then close the application.
document.onkeypress = function(e)

{

if (e.key=="back")

{

if (startcontainer.style.display!="none")

{

e.preventDefault();

//comment the line below if you want the user to see the tutorial from the beginning to the end

startcontainer.style.display="none";

}

}

}
Now he is the result of that code:
If you’re interested you can find the code here.
Enjoy and do not hesitate to leave remarks!!